
Introduction
Securing the backbone of today’s largest enterprises relies heavily on Java Enterprise Edition (JEE), which is pivotal in developing strong and scalable enterprise applications. As these applications become integral to business operations, they increasingly attract cyber-attacks. This blog post examines JEE’s security frameworks and practices, providing a comprehensive guide to fortifying enterprise applications against evolving threats. By reading this post, you will understand JEE security models, learn to implement effective authentication and authorization mechanisms and explore advanced security features to enhance the protection of your application.
Overview of JEE Security
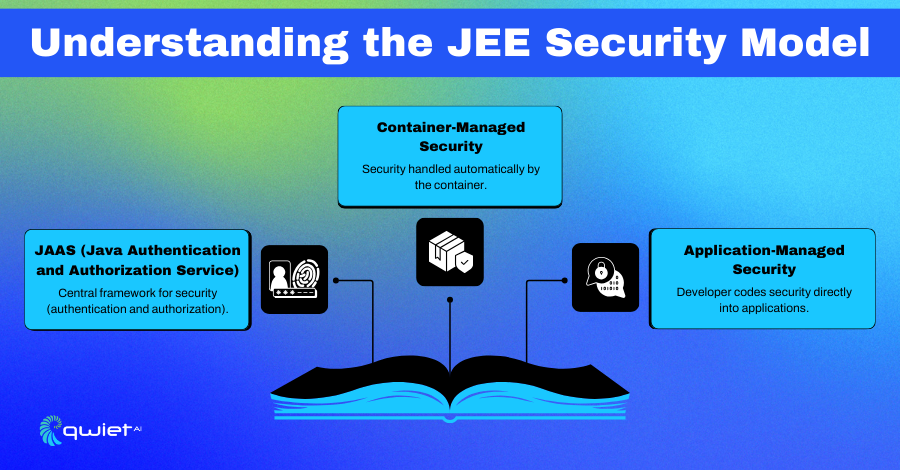
Java Enterprise Edition (JEE) provides a comprehensive security model to protect enterprise applications. The Java Authentication and Authorization Service (JAAS) is central to this model, which offers a flexible and modular framework for user authentication and authorization. JAAS allows developers to define security policies that govern access to application resources, ensuring that only authorized users can perform specific actions.
JEE supports both container-managed and application-managed security to cater to different security needs. Container-managed security relies on the application server to handle authentication and authorization, simplifying the process for developers by offloading security management.
On the other hand, application-managed security gives developers more control by allowing them to implement custom security mechanisms directly within their applications.
Security constraints in JEE are important in defining access control policies for web resources. These constraints can be specified in the web.xml deployment descriptor, where developers can enforce restrictions based on URL patterns, HTTP methods, and user roles. By applying security constraints, developers can ensure that sensitive resources are protected and only accessible to users with the appropriate permissions.
Securing JEE Applications
JEE provides a variety of authentication mechanisms, ensuring that developers can select the most appropriate method based on their application’s security needs. FORM-based authentication allows the creation of custom login forms, enabling a more tailored user experience. This method requires users to submit their credentials through an HTML form, which the server then processes.
Although simpler and widely supported, BASIC authentication sends credentials encoded in Base64, making it less secure if not used over HTTPS. For scenarios where these standard methods are insufficient, JEE allows for integrating custom authentication methods, providing flexibility to implement complex authentication logic such as multi-factor authentication or integration with external identity providers.
| // Example of FORM-based authentication configuration in web.xml <web-app> <login-config> <auth-method>FORM</auth-method> <form-login-config> <form-login-page>/login.html</form-login-page> <form-error-page>/login-error.html</form-error-page> </form-login-config> </login-config> <security-constraint> <web-resource-collection> <web-resource-name>Protected Area</web-resource-name> <url-pattern>/protected/*</url-pattern> </web-resource-collection> <auth-constraint> <role-name>user</role-name> </auth-constraint> </security-constraint> <security-role> <role-name>user</role-name> </security-role> </web-app> |
In the above example, FORM-based authentication is set up in the web.xml file. The login-config section specifies the type of authentication (FORM) and provides paths to the login and error pages. The security-constraint section defines which URLs are protected (/protected/*) and restricts access to users with the ‘user’ role. The security-role section maps the role name used in the auth-constraint.
Authorization Strategies
Role-based access control (RBAC) in JEE simplifies managing permissions by associating roles with permissions rather than individual users. Each user is assigned one or more roles, determining their access to various resources and actions within the application.
RBAC helps maintain a clear separation of concerns, making auditing and managing permissions easier. By defining roles at the application level, developers can ensure consistent and centralized access control policies across the entire application.
| // Example of RBAC in a servlet @WebServlet(“/admin”) @ServletSecurity(@HttpConstraint(rolesAllowed = “admin”)) public class AdminServlet extends HttpServlet { protected void doGet(HttpServletRequest request, HttpServletResponse response) throws ServletException, IOException { response.getWriter().println(“Welcome Admin”); } } |
The above demonstrates the use of RBAC through annotations in a servlet. The @ServletSecurity annotation is applied to the /admin servlet, specifying that only users with the ‘admin’ role are permitted access via the @HttpConstraint annotation. This ensures that unauthorized users attempting to access the servlet will be denied, thereby protecting administrative functions from unauthorized access.
Implementing Security Constraints
Security constraints in JEE are important for defining access control policies for web resources. These constraints can be specified in the web.xml file or directly in the code using annotations, providing flexibility in applying security policies. By defining security constraints, developers can enforce strict access control measures, ensuring that sensitive resources are only accessible to authorized users.
| // Example of security constraints in web.xml <web-app> <security-constraint> <web-resource-collection> <web-resource-name>Admin Area</web-resource-name> <url-pattern>/admin/*</url-pattern> </web-resource-collection> <auth-constraint> <role-name>admin</role-name> </auth-constraint> </security-constraint> <security-role> <role-name>admin</role-name> </security-role> </web-app> |
In the above code snippet, the security constraints are defined in the web.xml file. The security-constraint section specifies that the URL pattern /admin/* is protected and requires users to have the ‘admin’ role to access it. The auth-constraint element ensures that only users with the ‘admin’ role can access the defined resource.
Implementing Encryption and Secure Communication
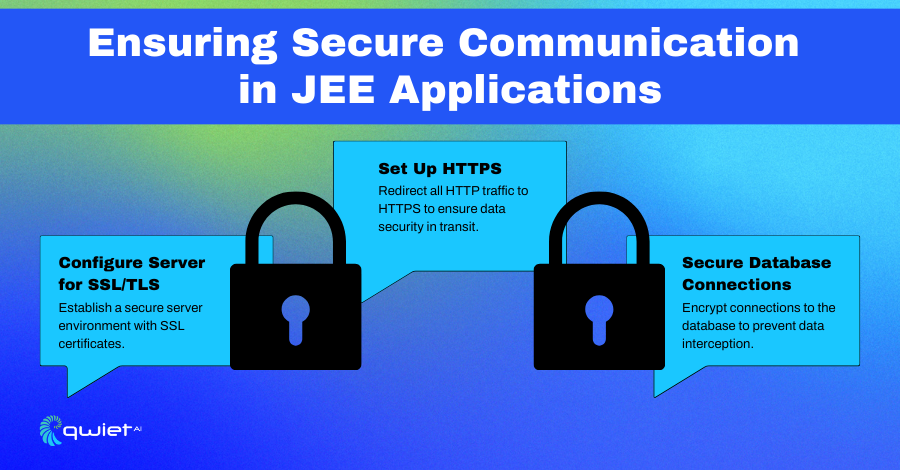
To protect the data transmitted between clients and servers, JEE applications should use SSL/TLS. This ensures that data remains confidential and unaltered during transmission. SSL/TLS encrypts the data, making it unintelligible for unauthorized parties to intercept the communication. Implementing SSL/TLS involves configuring the server to use a digital certificate and establishing secure connections, enhancing security posture by preventing eavesdropping and man-in-the-middle attacks.
| <!– Example configuration for SSL/TLS in server.xml (Apache Tomcat) –> <Connector port=“8443” protocol=“org.apache.coyote.http11.Http11NioProtocol” maxThreads=“150” SSLEnabled=“true”> <!– Enable SSL on this connector –> <SSLHostConfig> <!– Specify the location of the keystore file containing the server’s certificate –> <Certificate certificateKeystoreFile=“conf/keystore.jks” certificateKeystorePassword=“password” type=“RSA” /> </SSLHostConfig> </Connector> |
In this configuration snippet for Apache Tomcat, the <Connector> element is configured to use SSL on port 8443. The SSLEnabled attribute is true, and the SSLHostConfig element specifies the keystore file and password containing the server’s digital certificate.
This setup ensures that all data transmitted over this connection is encrypted using SSL/TLS. By encrypting the data, SSL/TLS protects against eavesdropping and data tampering, significantly enhancing the overall security posture.
Configuring JEE Applications to Use HTTPS
Configuring JEE applications to use HTTPS involves specifying the secure transport guarantee in the web.xml file. This ensures that all requests to the application are redirected to HTTPS, providing a secure communication channel between clients and the server. Enforcing HTTPS prevents sensitive data from being transmitted in plaintext, thus improving security by ensuring data confidentiality and integrity.
| <!– Example of enforcing HTTPS in web.xml –> <web-app> <security-constraint> <web-resource-collection> <web-resource-name>Secure Area</web-resource-name> <!– Apply this security constraint to all URL patterns –> <url-pattern>/*</url-pattern> </web-resource-collection> <user-data-constraint> <!– Enforce the use of HTTPS for this security constraint –> <transport-guarantee>CONFIDENTIAL</transport-guarantee> </user-data-constraint> </security-constraint> </web-app> |
In this example, the web.xml file is configured to enforce HTTPS. The security-constraint element defines a web-resource-collection that applies to all URL patterns (/*). The user-data-constraint element specifies a CONFIDENTIAL transport guarantee, ensuring that all data exchanges with the server occur over HTTPS. This prevents data from being transmitted in plaintext, enhancing security by protecting against eavesdropping and ensuring data integrity.
Setting Up Secure JNDI Resources and Encrypting Database Connections
JEE applications often rely on JNDI for resource lookup, including database connections. Securing JNDI resources and encrypting database connections are critical to protecting sensitive data from unauthorized access and interception.
Configuring secure JNDI resources involves setting up encrypted connections and ensuring that sensitive information, such as credentials, is securely managed.
| <!– Example of setting up a secure JNDI DataSource in context.xml (Apache Tomcat) –> <Context> <Resource name=“jdbc/MyDB” auth=“Container” type=“javax.sql.DataSource” maxTotal=“20” maxIdle=“10” maxWaitMillis=“-1” username=“dbuser” password=“dbpassword” driverClassName=“com.mysql.cj.jdbc.Driver” url=“jdbc:mysql://localhost:3306/mydb?useSSL=true&requireSSL=true” connectionProperties=“useUnicode=true;characterEncoding=UTF-8;encrypt=true;trustServerCertificate=true;”/> </Context> |
As you can see above, the JNDI DataSource is configured in the context.xml file of Apache Tomcat. The url attribute includes parameters to enable SSL (useSSL=true&requireSSL=true).
The connectionProperties attribute specifies additional properties to ensure the connection is encrypted (encrypt=true) and that the server’s certificate is trusted (trustServerCertificate=true). Setting the configuration up this way ensures encrypted database connections protect sensitive data from interception and unauthorized access.
Preventing Common Security Threats in JEE
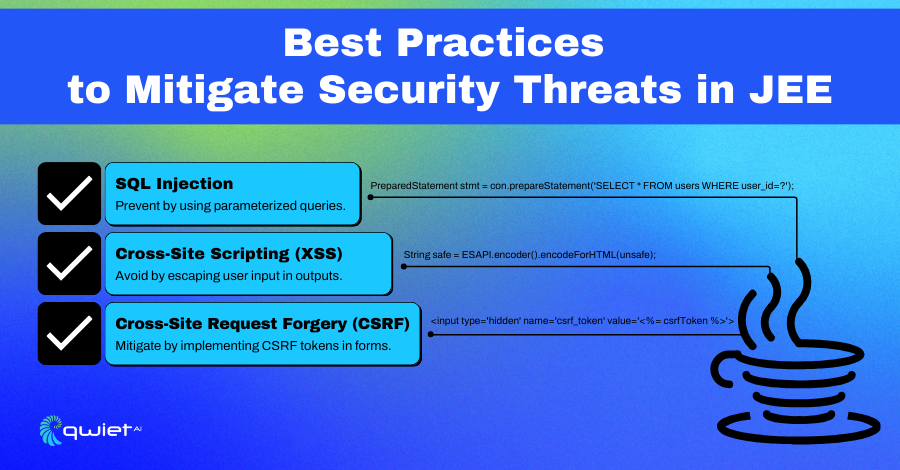
Developers should follow best practices to safeguard JEE applications against common security threats, such as SQL Injection, Cross-Site Request Forgery (CSRF), and Cross-Site Scripting (XSS).
For SQL Injection, always use prepared statements or parameterized queries to avoid injecting malicious SQL code. CSRF can be mitigated by implementing anti-CSRF tokens that validate the origin of requests. XSS attacks can be prevented by properly encoding user inputs and outputs, ensuring malicious scripts are not executed in the user’s browser.
| // Example of using a PreparedStatement to prevent SQL Injection String query = “SELECT * FROM users WHERE username = ? AND password = ?”; try (Connection conn = dataSource.getConnection(); PreparedStatement pstmt = conn.prepareStatement(query)) { pstmt.setString(1, username); pstmt.setString(2, password); ResultSet rs = pstmt.executeQuery(); while (rs.next()) { // Process the results } } catch (SQLException e) { e.printStackTrace(); } |
As demonstrated above, the PreparedStatement executes an SQL query. By using placeholders (?) and setting the values with pstmt.setString(), the input values are properly escaped, preventing SQL injection attacks. This approach ensures that user inputs are treated as data rather than executable code.
Utilizing JEE Filters and Listeners to Enhance Security
JEE filters and listeners are powerful for implementing security measures across web applications. Filters can inspect and modify request and response objects, making them ideal for input validation, logging, and injecting security headers. Listeners can monitor application events, providing hooks for initializing security configurations and performing cleanup tasks.
| // Example of a Filter to prevent XSS attacks @WebFilter(“/*”) public class XSSFilter implements Filter { public void doFilter(ServletRequest request, ServletResponse response, FilterChain chain) throws IOException, ServletException { HttpServletRequest req = (HttpServletRequest) request; chain.doFilter(new XSSRequestWrapper(req), response); } // Implementation of XSSRequestWrapper omitted for brevity } |
As you can see above, the XSSFilter inspects incoming requests and wraps them in an XSSRequestWrapper, which sanitizes the inputs to prevent XSS attacks. By applying this filter to all incoming requests (/*), the application ensures that all user inputs are sanitized before processing.
CSRF Attack Prevention Techniques
Implementing security measures directly in the code ensures that potential vulnerabilities are addressed at the source. Validating input data, setting secure headers, and using security annotations effectively prevent common CSRF attacks.
| // Example of CSRF prevention using a custom filter @WebFilter(“/*”) public class CSRFTokenFilter implements Filter { public void doFilter(ServletRequest request, ServletResponse response, FilterChain chain) throws IOException, ServletException { HttpServletRequest req = (HttpServletRequest) request; HttpServletResponse res = (HttpServletResponse) response; if (req.getMethod().equalsIgnoreCase(“POST”)) { String csrfToken = req.getParameter(“csrfToken”); HttpSession session = req.getSession(false); if (session == null || csrfToken == null || !csrfToken.equals(session.getAttribute(“csrfToken”))) { res.sendError(HttpServletResponse.SC_FORBIDDEN, “CSRF token validation failed”); return; } } chain.doFilter(request, response); } } |
In this code snippet above the CSRFTokenFilter checks for the presence and validity of a CSRF token in POST requests. The request is rejected with a 403 Forbidden status if the token is missing or invalid. This approach ensures that only requests originating from legitimate sources are processed, effectively mitigating CSRF attacks.
By adopting these best practices and utilizing JEE filters and listeners, developers can significantly enhance the security of their applications. These measures help prevent SQL injection, CSRF, and XSS attacks, ensuring the application is more resilient against common security threats.
Advanced Security Features in JEE
JASPIC (Java Authentication SPI for Containers) allows developers to implement custom security modules that can be integrated into the container’s security framework. This flexibility is particularly useful for applications with unique authentication requirements that standard JEE security mechanisms cannot fulfill.
JASPIC enables the creation of custom authentication mechanisms and their seamless integration with the container, enhancing the security and customization capabilities of the application.
| // Example of a JASPIC ServerAuthModule implementation public class CustomServerAuthModule implements ServerAuthModule { @Override public void initialize(MessagePolicy requestPolicy, MessagePolicy responsePolicy, CallbackHandler handler, Map<String, String> options) { // Initialization logic for the authentication module } @Override public Class<?>[] getSupportedMessageTypes() { return new Class<?>[]{HttpServletRequest.class, HttpServletResponse.class}; } @Override public AuthStatus validateRequest(MessageInfo messageInfo, Subject clientSubject, Subject serviceSubject) throws AuthException { HttpServletRequest request = (HttpServletRequest) messageInfo.getRequestMessage(); HttpServletResponse response = (HttpServletResponse) messageInfo.getResponseMessage(); // Custom authentication logic String token = request.getHeader(“Authorization”); if (token != null && validateToken(token)) { clientSubject.getPrincipals().add(new CustomPrincipal(token)); return AuthStatus.SUCCESS; } response.sendError(HttpServletResponse.SC_UNAUTHORIZED, “Authentication Failed”); return AuthStatus.SEND_FAILURE; } @Override public AuthStatus secureResponse(MessageInfo messageInfo, Subject serviceSubject) throws AuthException { return AuthStatus.SEND_SUCCESS; } @Override public void cleanSubject(MessageInfo messageInfo, Subject subject) throws AuthException { // Cleanup logic } private boolean validateToken(String token) { // Token validation logic return “valid-token”.equals(token); } } |
In this example, a CustomServerAuthModule implements the ServerAuthModule interface. The validateRequest method contains the custom authentication logic, which validates a token provided in the Authorization header. The user is authenticated if the token is valid; otherwise, an unauthorized response is returned. This implementation demonstrates how JASPIC can be used to create flexible and powerful custom authentication modules.
Integrating External Security Systems (e.g., LDAP, OAuth2) with JEE
Integrating external security systems like LDAP and OAuth2 with JEE applications can provide strong authentication and authorization mechanisms. LDAP is commonly used for centralized authentication, while OAuth2 allows for secure token-based authentication and authorization. Integrating these systems can enhance the application’s security by leveraging established and widely-used authentication protocols.
| <!– Example of LDAP authentication configuration in web.xml –> <web-app> <security-role> <role-name>user</role-name> </security-role> <login-config> <auth-method>BASIC</auth-method> <realm-name>LDAP Realm</realm-name> </login-config> <security-constraint> <web-resource-collection> <web-resource-name>Protected Area</web-resource-name> <url-pattern>/protected/*</url-pattern> </web-resource-collection> <auth-constraint> <role-name>user</role-name> </auth-constraint> </security-constraint> </web-app> |
The above snippet demonstrates how BASIC authentication is configured in the web.xml file to authenticate users against an LDAP server. The login-config specifies the authentication method and realm name. The security-constraint section restricts access to the protected area (/protected/*) to users with the ‘user’ role. By integrating LDAP, the application can leverage centralized user management and authentication, enhancing security and simplifying user administration.
Enhancing Application Security Using Third-Party Libraries and Tools
Third-party libraries and tools can significantly enhance the security of JEE applications by providing additional security features and simplifying the implementation of complex security requirements.
Libraries like Spring Security offer comprehensive security solutions, including authentication, authorization, and protection against common vulnerabilities.
| // Example of using Spring Security to secure a JEE application @Configuration @EnableWebSecurity public class SecurityConfig extends WebSecurityConfigurerAdapter { @Override protected void configure(HttpSecurity http) throws Exception { http .authorizeRequests() .antMatchers(“/public/**”).permitAll() .antMatchers(“/admin/**”).hasRole(“ADMIN”) .anyRequest().authenticated() .and() .formLogin() .loginPage(“/login”) .permitAll() .and() .logout() .permitAll(); } @Autowired public void configureGlobal(AuthenticationManagerBuilder auth) throws Exception { auth .inMemoryAuthentication() .withUser(“user”).password(“{noop}password”).roles(“USER”) .and() .withUser(“admin”).password(“{noop}admin”).roles(“ADMIN”); } } |
In this code snippet, Spring Security is used to secure a JEE application. The SecurityConfig class extends WebSecurityConfigurerAdapter to customize the security configuration. The configure method defines access control rules, allowing public access to /public/**, restricting access to /admin/** to users with the ‘ADMIN’ role, and requiring authentication for all other requests. The configureGlobal method sets up in-memory authentication with predefined users and roles. Using Spring Security, developers can quickly implement robust security features, enhancing the application’s overall security posture.
Conclusion
We have explored key aspects of securing JEE applications, including authentication mechanisms, authorization strategies, encryption, secure communication, and advanced security features. Staying ahead in the ever-changing cybersecurity landscape requires continual updates and audits of your security practices. By leveraging JEE’s powerful security features, you can ensure your enterprise applications remain resilient against threats.
Ready to elevate your enterprise application security? Book a demo to discover how Qwiet can help secure your enterprise applications.