

Introduction
HTTP Security Headers are akin to the guardians of web security, playing a pivotal role in safeguarding web applications against a myriad of threats. However, the path to implementing these headers is riddled with potential missteps. A minor misconfiguration can render them ineffective, exposing your application to exploits. This article will unravel developers’ typical mistakes while implementing HTTP security headers and provide insights into debugging and rectifying them effectively.
Understanding HTTP Security Headers
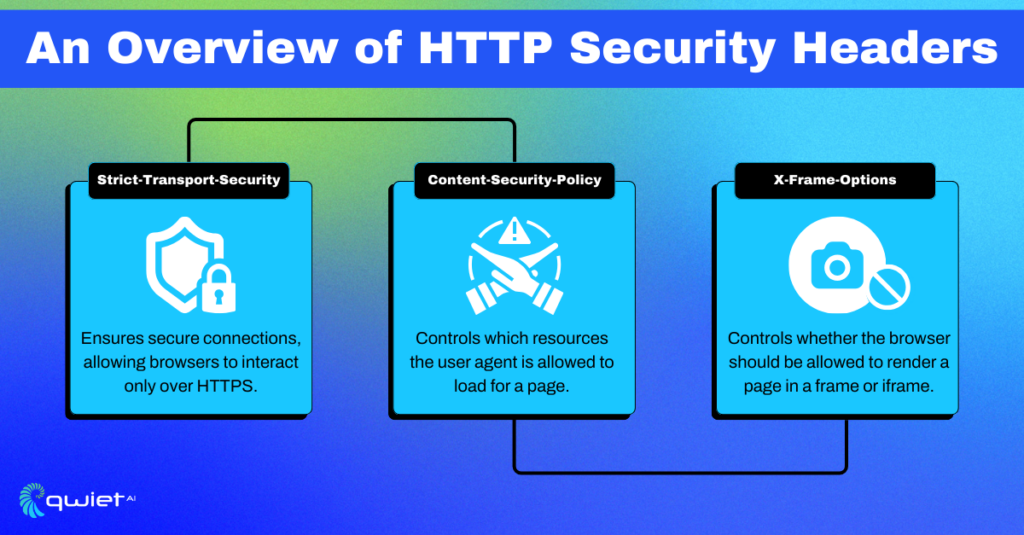
HTTP Security Headers are response headers that, when correctly configured, build a robust security shield around your web applications. They instruct browsers on how to behave and interact with the content, enabling restrictions to mitigate attacks such as Cross-Site Scripting (XSS) and Clickjacking.
| // Example of a Strict-Transport-Security Header Strict-Transport-Security: max-age=31536000; includeSubDomains |
This header example enforces secure connections, ensuring that browsers interact with the domain only over HTTPS, reducing the risk of man-in-the-middle attacks.
Common Implementation Mistakes
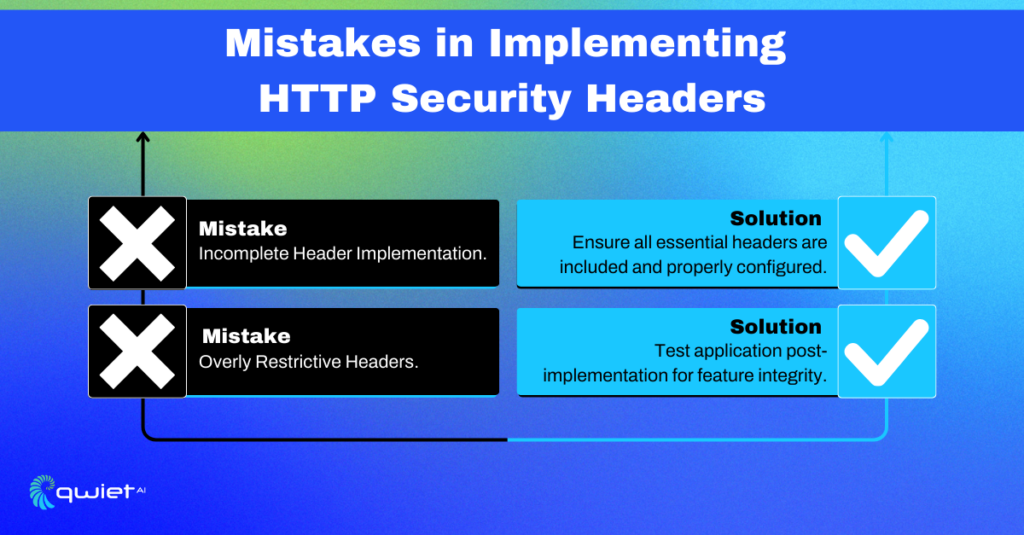
1. Incomplete Header Implementation:
A common pitfall in implementing HTTP Security Headers is the partial application, which often stems from a need to understand each header’s full potential. For example, while setting the Content-Security-Policy header, developers might restrict it to ‘self’ sources but neglect to define policies for external scripts, fonts, or frames.
This oversight not only limits the functionality of your web application but also leaves it vulnerable to certain types of attacks, like resource injection. The key is to map out all the resources your application relies on and explicitly define policies for each. For instance:
| Content-Security-Policy: default-src ‘self’; img-src https://*; child-src ‘none’; |
This configuration ensures more comprehensive protection by allowing images from all secure origins while disallowing any child frames.
Debugging Tips:
- Ensure all essential headers are included and properly configured in your responses.
- Validate your header configurations using online tools like Security Headers to identify and rectify any omissions or misconfiguration.
2. Overly Restrictive Headers:
Over-securing can be as detrimental as under-securing. A classic example is the overuse of the X-Frame-Options header. While it’s crucial to prevent clickjacking attacks, setting this header to ‘DENY’ universally can impede legitimate integrations, such as embedding your page in a trusted partner’s iframe. A more balanced approach is setting this header to ‘SAMEORIGIN’, or better yet, using the Content-Security-Policy frame-ancestors directive, which offers more granular control:
| Content-Security-Policy: frame-ancestors ‘self’ https://trustedpartner.com; |
This allows framing by your domain and the specified trusted partner, preventing misuse while maintaining functionality.
Debugging Tips:
- Test your application thoroughly after implementing security headers to ensure no legitimate functionality is broken.
- Gradually tighten security header policies, monitor for any disruptions in application behavior, and adjust as necessary.
Best Practices for HTTP Security Header Implementation
1. Version Control and Change Management for Header Configurations:
Utilize version control systems like Git to manage changes in your security headers. This allows you to track revisions, roll back to previous configurations if issues arise, and maintain a history of changes.
For example, use Git branches to test new header configurations in a staging environment before merging them into your production settings.
2. Automating Header Deployment with CI/CD Pipelines:
Integrate the deployment of your security headers into your Continuous Integration/Continuous Deployment (CI/CD) pipeline. This ensures that headers are consistently applied across all environments. You can use tools like Jenkins or GitLab CI to automate the deployment process.
For instance, create scripts that automatically add or update security headers like Strict-Transport-Security or Content-Security-Policy during deployment.
Like Jenkins, you can create a pipeline script (Jenkinsfile) that includes steps to configure HTTP headers during deployment automatically.
Here’s an example Jenkinsfile snippet:
| pipeline { agent any stages { stage(‘Deploy’) { steps { // Other deployment steps sh ”’ # Add Strict-Transport-Security header echo “Strict-Transport-Security: max-age=63072000; includeSubDomains; preload” >> .htaccess # Add Content-Security-Policy header echo “Content-Security-Policy: default-src ‘self’; script-src ‘self’ https://trusted-scripts.com;” >> .htaccess ”’ } } } } |
3. Header Configuration Templates for Different Environments:
Maintain different configuration templates for development, staging, and production environments. This approach allows you to have stricter headers in production, such as a more restrictive Content-Security-Policy, while having a more relaxed configuration in development for easier testing and debugging. Use configuration management tools like Ansible or Puppet to manage and apply these templates.
Using Ansible, you can define different security header configurations for each environment.
Here’s an example of Ansible playbook snippets for different environments:
Development Environment:
| – hosts: development_servers tasks: – name: Configure less restrictive CSP for development lineinfile: path: /etc/apache2/conf-enabled/security-headers.conf line: ‘Header set Content-Security-Policy “default-src \’self\'”‘ |
Production Environment:
| – hosts: production_servers tasks: – name: Configure stricter CSP for production lineinfile: path: /etc/apache2/conf-enabled/security-headers.conf line: ‘Header set Content-Security-Policy “default-src \’self\’; script-src \’self\’ https://trusted-scripts.com;”‘ |
4. Performance Impact Analysis of Security Headers:
Analyze the impact of security headers on the performance of your application. Some headers, like Content-Security-Policy, can add processing overhead or impact loading times. Use performance monitoring tools like Google Lighthouse or WebPageTest to measure the impact and adjust your headers accordingly.
Here’s a basic example of how you might integrate Lighthouse into a GitLab CI pipeline:
| image: node:latest stages: – performance_test performance_test: stage: performance_test script: – npm install -g lighthouse – lighthouse https://yourwebsite.com –output json –output-path ./lighthouse/report.json artifacts: paths: – ./lighthouse |
This GitLab CI configuration installs Lighthouse, runs it against your website, and saves the report as an artifact.
Conclusion
HTTP Security Headers are fundamental components in securing web applications. However, common implementation mistakes, such as incomplete header implementation and overly restrictive configurations, can compromise their effectiveness. If you are looking to help catch these types of security issues before your code hits production, reach out to our team to see how Qwiet can help secure your code pipeline.